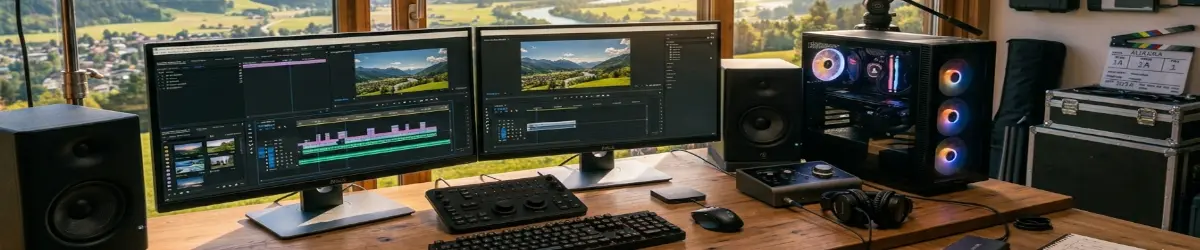
Low-Budget Video Creation Strategy.
2026-08-14
🎥 Building a Video Studio Without a Studio.
Video creation can look expensive from the outside.
Cameras.
Tripods.
Studio lighting.
Professional microphones.
Powerful computers.
Expensive editing software.
And then there is the inevitable question.
How can an ordinary person possibly compete with all that?
The answer is surprisingly simple.
You do not need all of it to start creating.
You need a workable idea, some basic equipment, suitable software, and a production system that matches what you actually have.
My own video plans for PlebWare are a good example.
My Current Situation.
I am not building a professional television studio.
I am working with limited resources.
My primary mobile camera is a Vivo smartphone.
I also have a Lenovo ThinkPad laptop with a built-in webcam.
For editing, I have access to free video-editing software, including Shotcut and OpenShot.
I already have experience creating videos, assembling multiple clips, adding sound, using downloaded public-domain footage, and producing more complicated presentations.
I have even experimented with OpenShot’s Blender integration to create animated, cinematic-style titles.
The important lesson is this.
Limited equipment does not necessarily mean limited creativity.
It simply means that the production method has to be designed around the equipment available.
The Equipment Does Not Have to Be Expensive.
The Vivo can serve as a capable portable camera.
It can record:
- Presenter footage.
- Demonstrations.
- Outdoor material.
- Behind-the-scenes footage.
- Close-ups.
- B-roll.
- Short social-media clips.
The ThinkPad provides another important tool.
Its webcam can be used for direct-to-camera presentations, while the computer itself can capture the screen for demonstrations and tutorials.
That creates three basic recording environments.
The Phone Camera.
Use the phone when the human element matters.
The Webcam.
Use the laptop webcam when presenting something from the computer.
The Screen.
Use screen recording when the subject is software, gaming, programming, or another digital activity.
Together, these three methods can produce a surprisingly flexible video-production system.
The Most Important Equipment Is Already Between Your Ears.
A camera records pictures.
A microphone records sound.
An editing program assembles clips.
But none of these things decides what the audience should see.
That is the job of the creator.
Good video is fundamentally about communication.
The equipment is simply the means of delivering that communication.
This is why I would rather produce a useful five-minute video with modest equipment than spend months waiting until I can afford a professional studio.
The goal is to create, not to wait.
Shotcut and OpenShot.
Both Shotcut and OpenShot have an important place in my video workflow.
OpenShot is particularly interesting because it provides Blender-powered animated 3D titles. Blender must be installed and correctly configured for that feature to work.
Shotcut is better suited to becoming my everyday production editor. It provides a flexible timeline-based workflow and tools for audio, filters, transitions, titles, effects, and exporting.
Shotcut also provides Preview Scaling and Proxy Editing, which can make editing more practical on modest hardware.
My practical strategy is therefore:
Shotcut for everyday production.
OpenShot when its particular features, especially Blender-powered animation, are useful.
The tools do not have to compete.
They can complement one another.
Build Videos From Small Pieces.
One of the most useful principles in my production strategy is this.
Do not try to record an entire video in one take.
Instead, create individual clips.
For example, a PlebMachine video might contain:
- An opening presentation.
- A screen recording of PlebMachine.
- A close-up demonstration.
- A terminal demonstration.
- A webcam explanation.
- Another screen recording.
- A closing presentation.
Each part can be recorded separately.
The clips can then be assembled in the editor.
This has a major advantage.
If one section goes wrong, only that section needs to be recorded again.
There is no need to restart the entire production.
Think Like a Journalist.
My background in writing and journalism naturally influences how I approach video.
A video should have a reason for existing.
Before recording, I should be able to answer three questions.
What am I showing?
Why should somebody care?
What will the viewer learn or experience by the end?
This turns video production into a form of visual journalism.
The camera records the evidence.
The narration explains the story.
The editing controls the pace.
The final video communicates the message.
PlebMachine as a Video Series.
PlebMachine provides an excellent subject for an ongoing video series because it is continuously developing.
Possible episodes include:
What Is PlebMachine?
An introduction to the project and the problem it is designed to solve.
Why I Built PlebMachine on MX Linux.
An explanation of the philosophy behind the system.
Inside PlebMachine Cognitive Mode.
A demonstration of the system’s state-based behaviour.
Building PlebMachine.
A behind-the-scenes look at development.
What Went Wrong?
An honest look at failed experiments, bugs, configuration problems, and the eventual solutions.
PlebMachine: What Comes Next?
A look at future development.
The important thing is that the project itself supplies the story.
I do not have to invent content.
I simply document what I am already building.
Gaming Videos.
The same strategy can be applied to gaming.
Raid Shadow Legends provides an obvious example.
A gaming video does not have to be a continuous recording of an entire gaming session.
Instead, interesting moments can be captured separately.
A champion can be introduced.
A build can be examined.
A mistake can be demonstrated.
A battle can be shown.
A strategy can be explained.
The individual clips can then be assembled into a coherent episode.
This also allows commentary to be recorded separately.
The result can be much more structured than simply broadcasting an entire gaming session.
Public-Domain and Licensed Footage.
Another useful technique is incorporating footage that I did not personally record.
I have previously used public-domain material downloaded from the internet when producing a demonstration for one of my books.
This can dramatically expand what a small creator can produce.
However, there is an important rule.
Never assume that something is free simply because it is available online.
For every external clip, I should record:
- The source.
- The original URL.
- The creator.
- The licence.
- Whether attribution is required.
- The date it was downloaded.
This creates a simple production record and makes it easier to verify the rights associated with material used in a project.
The PlebWare Production Folder.
A simple project structure can prevent considerable confusion.
For example:
PlebWare-Video/
└── Episode-001/
    ├── video/
    ├── audio/
    ├── screenshots/
    ├── public-domain/
    ├── music/
    ├── thumbnails/
    ├── subtitles/
    └── project/
The exact structure can evolve.
The principle is more important than the names.
Keep the original material, working material, project files, and finished material organised.
This becomes increasingly important as the number of videos grows.
The Basic Production Workflow.
My planned workflow is simple.
Step One — Plan.
Decide what the video is about.
Step Two — Gather.
Collect the footage, screenshots, music, graphics, and other material required.
Step Three — Record.
Record the individual sections rather than attempting one enormous take.
Step Four — Assemble.
Bring the material into the editing program.
Step Five — Rough Cut.
Remove mistakes, unnecessary pauses, repetitions, and irrelevant material.
Step Six — Audio.
Make the narration and other important audio understandable.
Step Seven — Visuals.
Add titles, graphics, screenshots, transitions, and supporting footage where they actually help.
Step Eight — Subtitles.
Create subtitles where appropriate.
Step Nine — Review.
Watch the entire production from beginning to end.
Step Ten — Export.
Create the final video.
Step Eleven — Publish.
Upload the video and connect it back to the appropriate PlebWare article.
This creates a repeatable system rather than treating every video as a completely new experiment.
One Video Can Become Many Things.
The most important part of this strategy is not the video itself.
It is what happens afterwards.
A single video can become several pieces of content.
The original video can become:
- A YouTube presentation.
- A PlebWare website article.
- A short promotional video.
- A social-media post.
- A thumbnail graphic.
- A transcript.
- A PlebVox-enabled article.
- A future tutorial.
This means the time spent producing one substantial video can continue generating useful material long after the original production is finished.
Connecting Video and the PlebWare Website.
The PlebWare website should become the publishing hub.
An article can introduce the subject.
The video can then demonstrate it.
A YouTube link can allow the visitor to watch the presentation.
The written article can provide additional detail.
PlebVox can provide an accessible spoken version of the written material.
This creates a relationship between written and visual publishing.
The website explains.
The video demonstrates.
PlebVox speaks.
YouTube distributes.
Together they form one publishing system.
A Practical First-Month Strategy.
The objective is not to produce dozens of videos immediately.
The objective is to establish a sustainable production rhythm.
Week One.
Prepare the equipment.
Test the Vivo camera.
Test the ThinkPad webcam.
Test screen recording.
Test microphone quality.
Confirm that Shotcut is working properly.
Keep OpenShot available for projects requiring its specialised features.
Week Two.
Create the first short PlebMachine video.
Keep it focused.
Do not attempt to explain everything.
Week Three.
Create a gaming video.
Raid Shadow Legends is an obvious candidate because gameplay provides plenty of visual material.
Week Four.
Create a more technical video combining:
- Webcam footage.
- Screen recording.
- Narration.
- Graphics.
- Demonstration footage.
At the end of the month, review what worked.
Then improve the production system rather than simply making everything more complicated.
The Long-Term Strategy.
The goal is not to become a professional filmmaker overnight.
The goal is to establish a sustainable PlebWare video operation using the equipment already available.
As experience grows, individual weaknesses can be identified.
Perhaps the lighting needs improvement.
Perhaps the microphone becomes the limiting factor.
Perhaps the laptop needs more memory.
Perhaps a phone tripod would make recording easier.
Those improvements can be made one at a time.
There is no reason to purchase everything before discovering what is actually necessary.
Improve the weakest part of the production chain.
That is a much more sensible strategy for a creator working on a budget.
The First Goal Is Ten Videos.
The first milestone should not be subscribers.
It should not be views.
It should not be expensive equipment.
It should be:
Ten finished videos.
After ten productions, I will know considerably more about my own workflow.
I will know:
- Which camera I prefer.
- Which recording method works best.
- Which editing features I actually use.
- Where the laptop struggles.
- What audio problems exist.
- How long production takes.
- Which subjects are easiest to produce.
- Which subjects people respond to.
- Which parts of the workflow should be improved.
Ten finished videos will teach more than ten weeks of planning.
The PlebWare Video Workshop.
This is therefore not an attempt to build a professional studio from scratch.
It is the beginning of a PlebWare Video Workshop.
The workshop can grow alongside the rest of the PlebWare ecosystem.
PlebMachine can provide technical subjects.
Gaming can provide entertainment and experimentation.
Writing can provide creative subjects.
Christian work can provide devotional and educational material.
Journalism can provide commentary and reporting.
The equipment may be modest.
The ideas do not have to be.
That is the real advantage of working with limited resources.
It forces the creator to concentrate on what actually matters.
The story.
The message.
The creativity.
The communication.
Everything else is equipment.
Follow-On Articles.
This article is intended to become the starting point for a larger PlebWare Video series.
Future articles can examine:
- Choosing and configuring Shotcut.
- Using OpenShot and Blender titles.
- Recording with an Android phone.
- Recording with a laptop webcam.
- Screen recording for tutorials.
- Recording voice-over.
- Editing multi-clip productions.
- Creating thumbnails.
- Creating subtitles.
- Using public-domain footage responsibly.
- Building a YouTube workflow.
- Creating short-form videos from longer productions.
- Connecting YouTube videos to PlebWare articles.
- Using PlebVox with video-related articles.
- Building a complete low-budget video-production workflow.
The equipment may change.
The software may change.
The technology will certainly change.
But the basic principle will remain.
Start with what you have.
Learn by doing.
Improve what actually needs improving.
And keep creating.
The First PlebWare Video.
The first video produced as part of this project will eventually appear here.
🎬 Watch the video on YouTube:
[Video link will be added after publication.]
The accompanying PlebWare article will provide the written background and additional information.
This is how the PlebWare Video Workshop begins.
Not with an expensive camera.
Not with a professional studio.
But with a creator, a phone, a laptop, some free software, and an idea worth sharing.
Every creator starts with what they have.
O.C. Verricchio